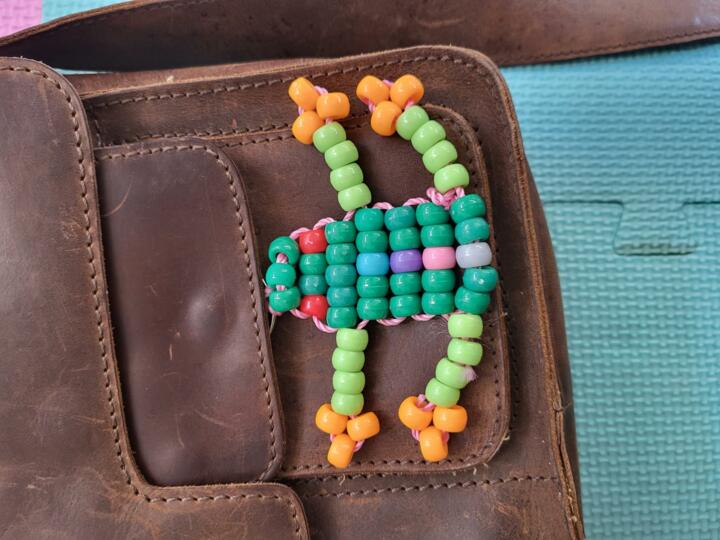
Beaded Froggy Keychain
Kick-art your summer with making a beaded froggy keychain.
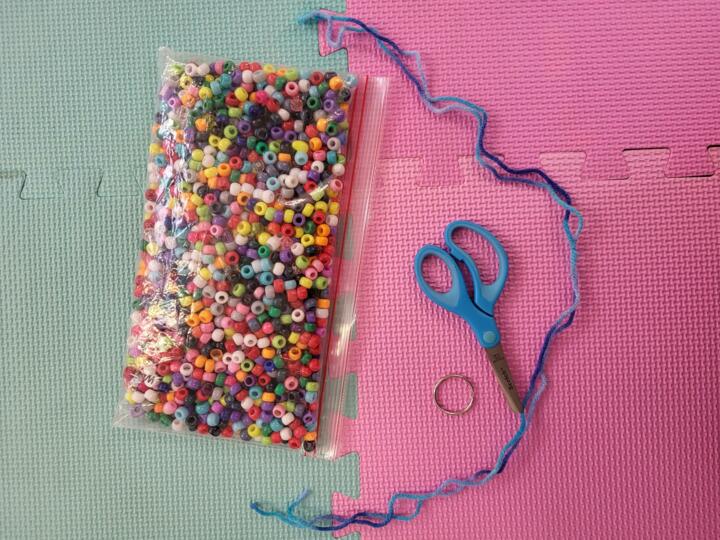
Items needed: String, a keychain ring, beads, and scissors.
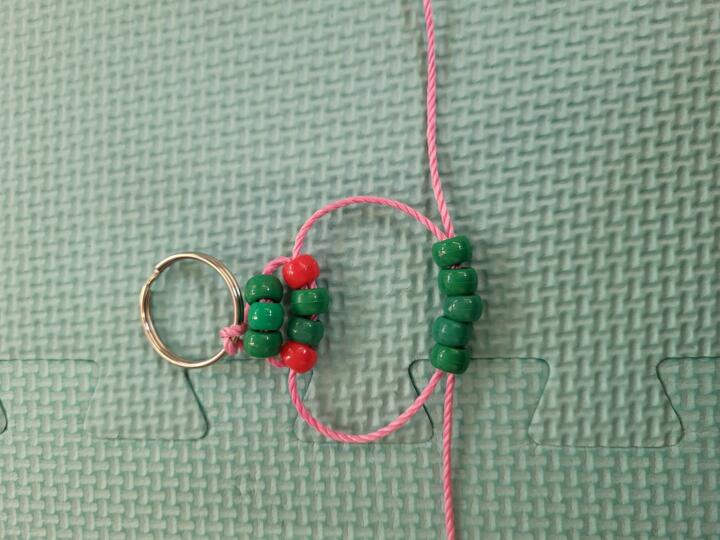
Our first step will be attaching the string to the keyring
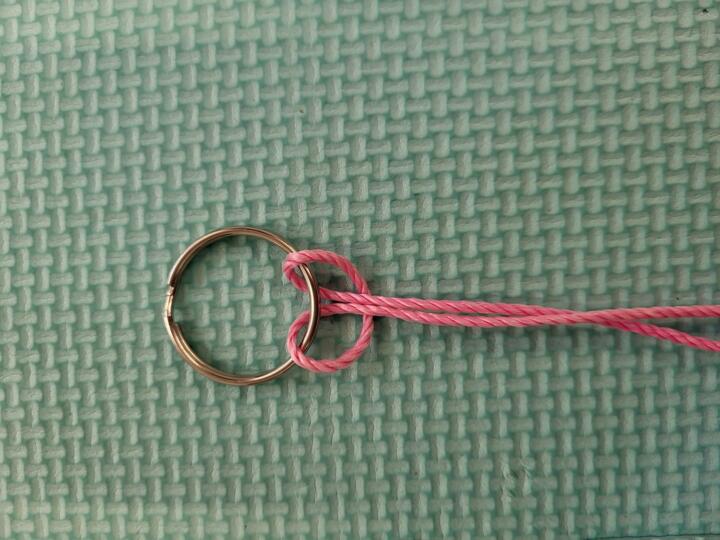
And making sure to pull it tight!

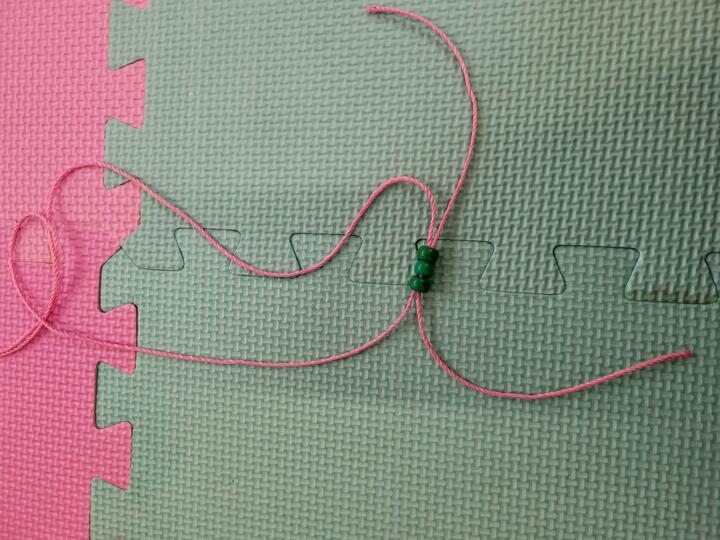
Then we can start adding our beads
Both strings should be sewn through the beads coming from opposite directions.
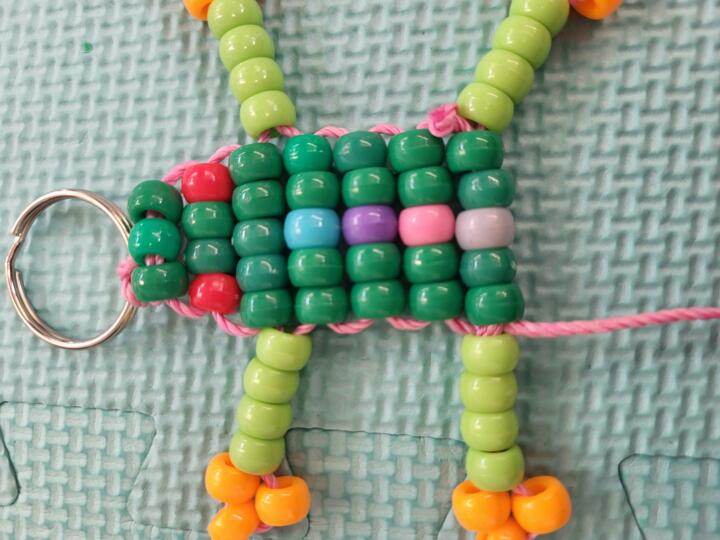
The first row will be our snout, and the next the eyes! So grab beads to be whatever eye color you want your frog to have
(The pattern is 3 beads then four)

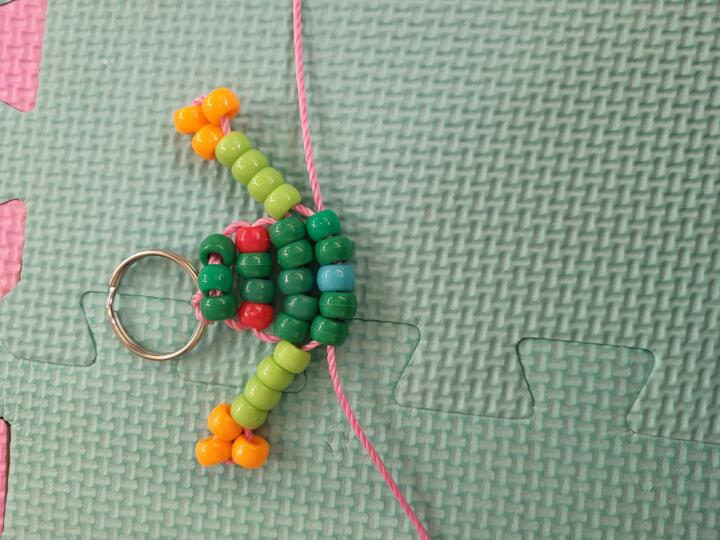
The next row will be the arms. Four beads should be added for the body the same way as the previous parts.
The arms are a bit different, first thread the beads leaving the fingers last on the string, and then loop the string back through the arm beads
Make sure to pull tight!

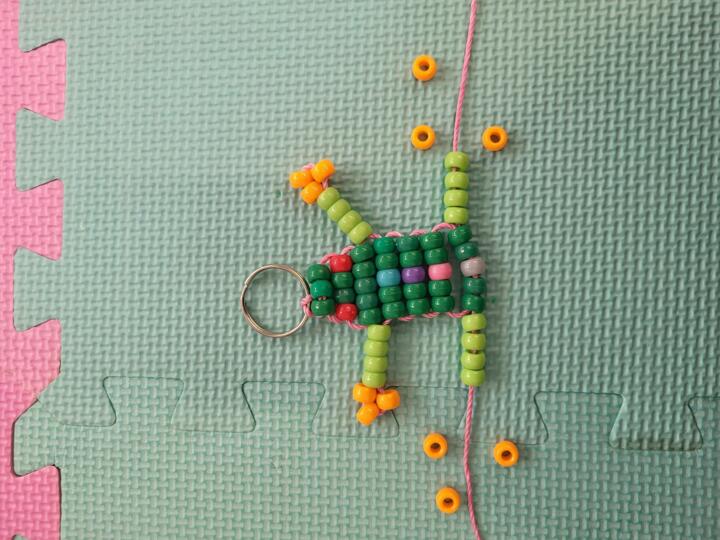
Now our frog needs a body, I've used a center bead to show how many rows of body I am adding.
When we get to the legs we repeat the same steps we used at the arms.
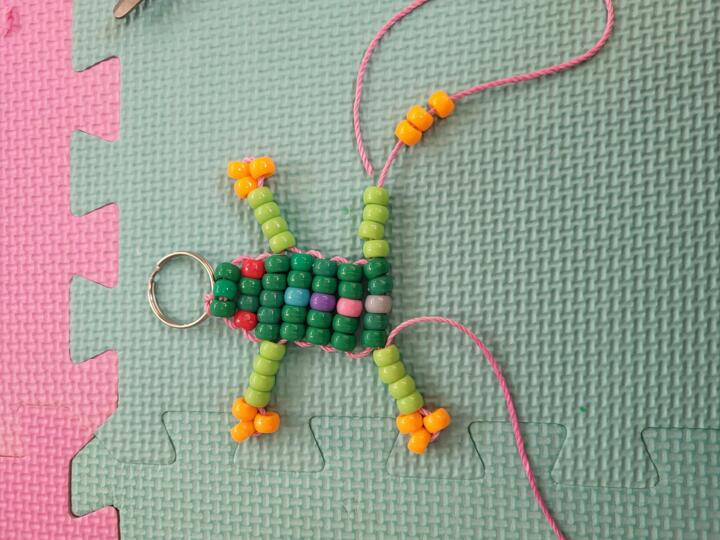
Then once our frog is complete we need to tie the loose strings. This can be done in different ways, I have knotted the string to itself, but you can use glue, or running the string back through and tying it off at another end.
Last but not least, display your frog!